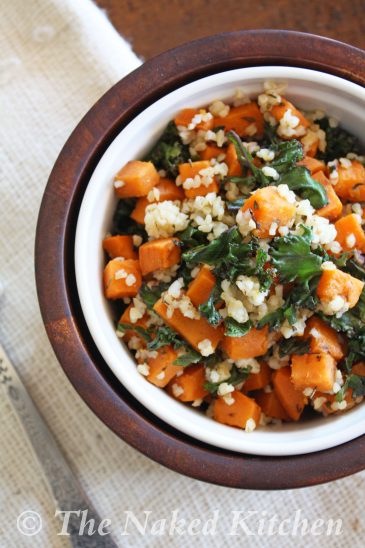
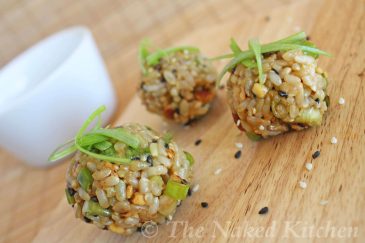
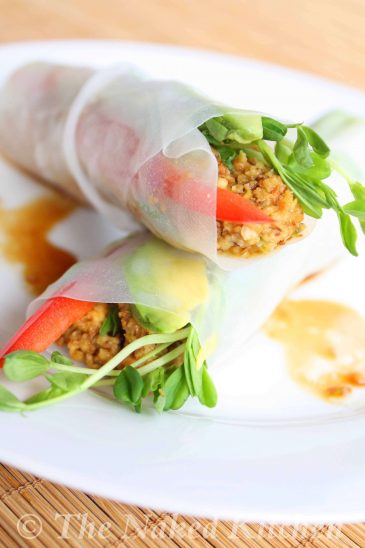
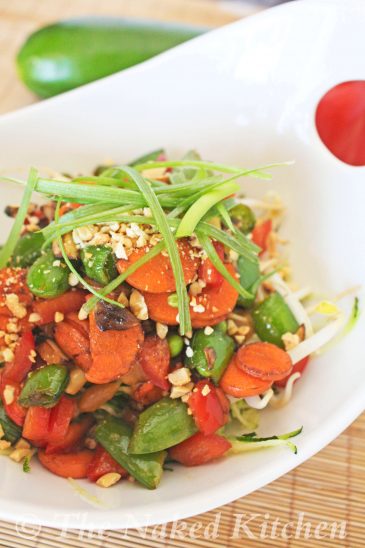
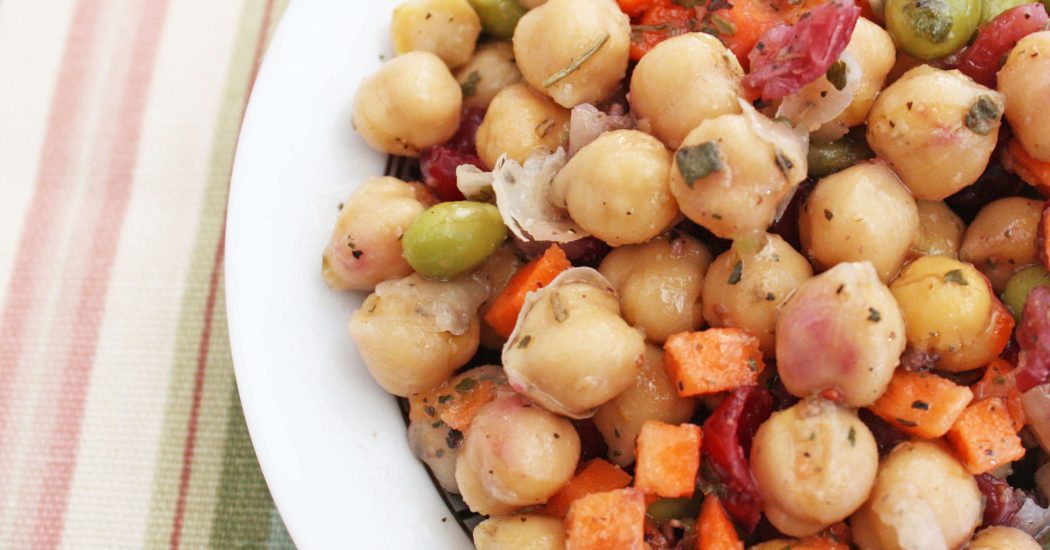
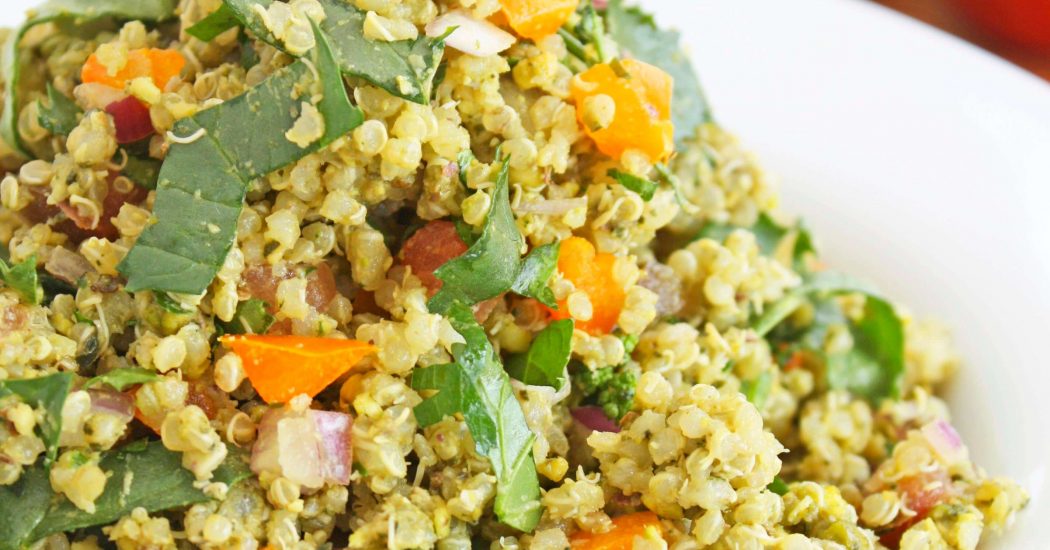
Archive for Dinner
Pizza Alla Raw
Feb 21 2013 by | Comments
Add to Recipe Box
I am a HUGE fan of pizza and so is my whole family! They would be quite happy to have a pizza night just about every single night. Unfortunately, traditional pizzas are not tipping the scales in the nutritional department – until now. This ‘raw’ pizza is amazing! If you’ve never had a raw pizza you are truly missing out. The marinated veggies are warm and comforting and the sauce and ‘cheese’ are to die for! This recipe does require a bit of work but it’s all worth it in the end when you sit back, take a bite and enjoy the most amazing pizza you’ve ever had. This week, Living On The Veg has truly outdone themselves! Enjoy.
My culinary roots were established in an Italian restaurant in which we made the pizza dough from scratch, hand-tossed it, then fired it in a wood burning oven, a hand crafted creation from start to finish. Also, it was a perfect canvas for showcasing the variety of ingredients and combination of flavors you can use to please anybody’s palette. With this raw pizza recipe we intertwine the aspect of nutrition with tradition, by offering an enzyme and nutrient rich option with all the classic tastes of Italy. Using fresh produce, herbs and spices, we present this Pizza alla Raw with confidence knowing it will astound any appetite and satisfy any stomach. “When the moon hits your eye like a big pizza pie, that’s AMORE! In Italian amore means love, and we know you’ll fall in love with this recipe after your first slice! Buon Apetito!
-Chef Matthew Purnell, Living On The Veg
Ingredients:
For the crust:
- 4 cups yams, roughly chopped
- 2 cups zucchini, roughly chopped
- 1 cup tomatoes, roughly chopped
- 1 cup carrots, roughly chopped
- 1 cup onions, roughly chopped
- 1 cup red bell pepper, roughly chopped
- 1 cup parsley
- 1 cup basil
- 2 tbsp fresh oregano
- 2 tbsp fresh rosemary
- 1 tbsp fresh thyme
- 1 tbsp sea salt
- 1 tbsp Italian seasoning
- 1 tsp black pepper
- 1 cup chia seeds, ground
- filtered water as needed
For the pizza sauce:
- 2 cups tomatoes of your choice
- 2 cups sun-dried tomatoes
- 1/4 cup extra virgin olive oil
- 1 cup basil
- 1 cup parsley
- 1/4 cup onion, roughly chopped
- 2 tbsp raw apple cider vinegar
- 2 tbsp minced garlic
- 1 tbsp coconut nectar
- 1 tsp sea salt
- 1 tsp black pepper
For the ‘cheese’:
- 2 cups cashews, soaked
- 2 tbsp raw apple cider vinegar
- 3 tbsp fresh lemon juice
- 1/2 tsp probiotic of your choice
- 1 tsp sea salt
- filtered water as needed
For the veggie mix:
- 4 cups mushrooms, thinly sliced
- 2 cups squash, thinly sliced
- 1 cup onions, thinly sliced
- 1 cup red bell pepper, thinly sliced
- 1/4 cup extra virgin olive oil
- 2 tbsp basil, shredded into thin strips (chiffonade)
- 2 tbsp parsley, chopped
- 2 tbsp Nama shoyu (if you follow a gluten free diet substitute with a gluten free soy sauce or tamari)
- 2 tbsp minced garlic
- 2 tsp Italian seasoning
- 1 tsp sea salt
- 1 tsp black pepper
Preparation:
- Add the first 14 crust ingredients to a blender and blend until well mixed (add a bit of filtered water as needed to help blend the ingredients).
- Transfer the mixture to a large mixing bowl and gradually add 1 tbsp ground chia seeds until the crust mixture begins to bind together. The mixture should be thick enough to spread on a teflex sheet without dripping over the sides.
- Form the crust mixture into desired shape and place in a dehydrator at 115 degrees for about 8 hours. Flip the crust over, remove the teflex sheet and continue to dehydrate for an additional 4 hours or until completely dried.
- Add all the ingredients for the pizza sauce to a blender or food processor. Process until well mixed and smooth.
- Rinse out the blender and add the ingredients for the ‘cheese’. Blend until throughly mixed. The ‘cheese’ should be a smooth thick consistency.
- Place all the ingredients for the veggie mix into a large bowl and toss until well coated. Evenly spread the mixture onto a teflex sheet and place in the dehydrator at 115 degrees 1-2 hours before serving your pizza.
- To assemble the pizza place a layer of pizza sauce evenly over the crust, cover with ‘cheese’ and top with the veggie mix. Serve immediately and enjoy!
Yield:
Makes one 12-14 inch pizza.
Notes:
Leftover pizza can be stored in an airtight container in the fridge for up to 3 days. Reheat in a dehydrator for best results.
All components can be made ahead of time and assembled as needed.
Springtime Tofu Scramble
Feb 19 2013 by | Comments
Add to Recipe Box
While I call this recipe a Springtime Tofu Scramble it would also be accurate to call it Tofu Scramble 2 Ways. Two different spring time vegetables, artichokes or asparagus can easily be interchanged depending on availability and your personal taste preferences. Tofu is marinaded in a light and lovely citrus/basil sauce and then scrambled together with mushrooms, carrots, spinach, tomato and leeks to make a delicious breakfast, lunch or dinner. If you are lucky enough to find another spring delicacy, ramps, you can use them in place of the leeks for an even tastier treat.
Either way this dish is delicious and a really good recipe to keep in mind for your Easter brunch.
Kristy
Ingredients:
For the marinade
- 1/4 fresh lemon juice
- zest from 1 lemon
- 3 tbsp olive oil
- 3 tbsp coconut aminos
- 2 tbsp fresh basil, minced
- 1 tbsp Dijon mustard
- 1 tbsp honey or coconut nectar
- 1/2 tsp tumeric
For the scramble
- 14 ounces (1 package) extra firm tofu, cut into cubes
- 2 tbsp olive oil
- 1 leek, white part and about 3 inches of the green top,cut in half, and thoroughly washed then thinly sliced
- 2 cloves garlic, minced
- 1/2 tsp sea salt
- 6 ounces artichoke hearts or about 6-8 artichoke hearts steamed or roasted and cut into quarters or 1 cup asparagus cut into 1 inch pieces
- 1 carrot, julienned
- 8 cremini mushrooms, sliced
- 1 medium sized tomato, diced
- 1 cup spinach, roughly chopped
Preparation:
- In a small bowl whisk together the marinade ingredients. Place the tofu cubes into a 1 gallon zip bag and pour in the marinade. Seal and place in the refrigerator at least 2 hours or up to 24 hours.
- In a large skillet (I use a very large 5 qt pan) heat the oil over medium high. Add the leeks, garlic and sea salt. Cook 4-5 minutes until the leeks are almost tender.
- Add the artichokes (or asparagus), carrots and mushrooms. Cook 2-3 minutes and then add the tomato and tofu (reserve the marinade). Break up the tofu by pressing with the back of a fork to create a scrambled egg kind of texture. Pour in half the marinade from the bag.
- Add the spinach and cook until the spinach is wilted and most of the marinade has cooked off.
- Serve with toast, in a tortilla or pita or on it’s own.
Yield:
Makes 4 servings.
Notes:
This dish is best eaten right away.
Pineapple Basil Kelp Noodles
Feb 12 2013 by | Comments
Add to Recipe Box
What better way to beat the winter blues than with a fun and delicious tropical recipe. This week’s recipe from Living On The Veg is sure to take you to the sunny shores of Maui. So sit back, enjoy the island breeze and forget all about that snow and cold.
I rarely frequent the produce aisle of the organic grocery store for my fruit and vegetable purchases. I prefer to pick up most of my plant food supply at Farmer’s Markets to maintain fresh, local, and in season foods. But when I went into my favorite local market, Cream of the Crop in Oceanside I was super excited to see one of my favorite fruits in season, pineapple! Not just any pineapple, because those will just not do, the Maui Gold Pineapples. They are always so sweet and delicious. They also have the rich deep flavor of actual pineapple, which is not the norm to me when purchasing a pineapple. Even an organic Dole pineapple can not come close to this. I wanted something savory and sweet, so I paired this pineapple with basil and my favorite kelp noodles for a dish that inspires the Aloha spirit. Enjoy!
~ Chef Fuji from Living On The Veg
Ingredients:
- 3 cups diced pineapple
- 1/4 cup coconut aminos
- 1 tbsp coconut nectar
- 1 tbsp no salt added almond butter
- 1 tbsp cayenne or other chile (if desired)
- 2 packages of kelp noodles, rinsed and drained
- 1/2 cup basil, chiffonade (thinly sliced)
- 1 cup broccoli florets
- 1 cup sweet peppers, julienned
Preparation:
- Cut noodles to desired length and place in a large bowl with basil, broccoli, and peppers, reserving 2 tbsp of basil for garnish.
- Add the first 5 ingredients to blender and process until the sauce is smooth.
- Pour the sauce over the noodles and veggies, stir and let marinate until noodles soften or place in dehydrator at 115 to warm about 20 minutes.
Yield:
Makes 4-6 servings.
Notes:
Leftover noodle salad can be stored in an airtight container in the fridge for up to 3 days.
Miso Salad with Pan Fried Tempeh
Jan 30 2013 by | CommentsI love miso, I love cabbage and I love pan fried tempeh. Why have I never thought to put them together before?! For this recipe I used my favorite three grain tempeh which, when pan fried, smells and tastes quite similar to bacon. I love the flavor the tempeh brings to this salad and the creamy miso dressing is good enough to drink! This salad makes for a complete meal so enjoy it for lunch or dinner.
~Sarah
Ingredients:
- 2 tbsp chickpea miso (or any variety of miso will do)
- 1/2 tsp ground yellow mustard
- 1 1/2 tbsp coconut nectar
- 1/4 cup brown rice vinegar
- 1/3 cup extra virgin olive oil
- 1 tsp toasted sesame oil
- 1 medium size savoy cabbage, chopped
- 8 ounce package three grain tempeh (you can use another variety of tempeh but it will slightly change the flavor of the salad)
- 1/4 cup finely diced red onion
- heaping 1/2 cup chopped chives
- 1-2 tbsp neutral cooking oil
Preparation:
- Place the first 6 ingredients in a small bowl and whisk together. Set the dressing aside.
- Use a hand chopper or a sharp knife to finely chop the tempeh – you want a very fine chop.
- Heat a large skillet over medium high heat and add the oil. Once the oil is heated add the tempeh and stirring often, sauté the tempeh until golden brown, about 5-7 minutes.
- In a large bowl toss together the cabbage, onion, chives and pan fried tempeh.
- Add the dressing and toss once more to evenly coat. Serve immediately.
Yield:
Serves 3-4 as a main dish or 6-8 as a side dish.
Notes:
This salad is best when eaten right away. If you plan to have leftovers it’s best to keep the components separate until ready to serve. The veggies, tempeh and dressing should all be stored separately.
Roasted Italian Pasta Sauce
Jan 23 2013 by | Comments
Add to Recipe Box
In winter I start to crave pasta – mostly spaghetti. There is just something so comforting about sitting down with a hot bowl of pasta and a slice of crusty bread. I love a simple pasta sauce yet I don’t like to skimp on flavor. This sauce is super quick to make and is full of flavor. For those that like a kick to your sauce – add in an extra 1/2 tsp of red pepper flakes. This recipe is proof that simple, wholesome ingredients make the most delicious, flavorful meals!
~Sarah
Ingredients:
- 1 red bell pepper, roasted, seeds removed
- 2 roma tomatoes, quartered
- 1 small onion, roughly chopped
- 1/4 cup packed fresh basil
- 2 cloves garlic, peeled
- 1/2 tsp crushed red pepper
- 8 ounce jar oil-packed sun-dried tomatoes
- 1/4 cup red wine vinegar
- 3 tbsp fresh lemon juice
- 1/4 cup olive oil
- 2 tbsp Dijon mustard
- 1 tsp sea salt or to taste
- Cooked pasta (reserve a little cooking water)
Preparation:
- In a blender or food processor add the first 5 ingredients and process until everything is very finely chopped.
- Add in the remaining ingredients and blend until throughly incorporated.
- Transfer to a large skillet and heat over low until simmering. Add cooked pasta and a little reserved cooking water until you have your desired consistency.
- This sauce is also good over rice, roasted vegetables or any other of your favorite grains.
Yield:
Makes approximately 3 cups of sauce.
Notes:
Leftover sauce can be stored in an airtight container in the fridge for up to 5 days. You can also freeze individual serving sizes in the freezer for future use.
Sauteed Kale with Thai Chili Cashew Sauce
Jan 21 2013 by | Comments
Add to Recipe Box
I’ve been eating kale for so long now that sometimes I tend to forget that “newbies” to healthy eating may not have tried it before. This classic sautéed kale dish is for those who are new to the delicious benefits of kale but kale “veterans” will find it appealing as well with the Thai inspired sauce that goes with it.
Kristy
Ingredients:
- 1/2 medium onion, diced
- 1 can (14.5 ounces) diced tomatoes
- 1/4 cup chopped cilantro (tear or cut off the stems and use the green tops only)
- 1 lime, juiced
- 1/2 cup raw cashews
- 2-4 tbsp Thai Chili Paste (if you don’t have this made up you can substitute with red curry paste)
- 2 tbsp olive oil, divided
- 1/2 tsp sea salt, divided
- 2 big bunches lacinato kale, stems removed and roughly chopped
- 1 cup shredded carrot
- 2 cloves garlic, minced
- 1/2 cup low sodium vegetable broth
- 2 tbsp coconut aminos
- 2 cups cooked quinoa, brown rice or millet (optional)
Preparation:
- In a large skillet heat 1 tbsp oil over medium high heat. Add the onion and 1/4 tsp salt and cook until tender, about 5 minutes.
- Add the tomatoes and the remaining 1/4 tsp salt. Cover and lower heat to a simmer. Cook 5-10 minutes.
- Pour the tomato mixture into a blender or food processor being careful of the hot liquid.
- Add the cilantro, lime juice, 2 tbsp Thai Chili Paste and cashews. Process until smooth. Taste and add more chili paste if desired.
- Rinse and wipe out the skillet used for the onions and tomatoes. Add the remaining 1 tbsp of oil and heat over medium high heat.
- Add the carrots and garlic. Cook 5 minutes or just until the carrots are starting to soften. Add the kale, and broth. Cover and lower heat to a simmer. Cook 5 minutes or until the kale is wilted.
- Remove the cover and continue to cook until the liquid has evaporated. Season with the coconut aminos.
- Divide the kale evenly onto serving plates and top with the desired amount of sauce. To make a complete meal serve over quinoa, brown rice or millet.
Yield:
4 servings with sauce to spare.
Notes:
The sautéed kale is best eaten right away but any leftover sauce can be stored in an airtight container for up to 5 days. Use leftover sauce stirred into cooked rice or add to roasted vegetables for a change of flavor.
Broccoli and White Bean Soup
Jan 14 2013 by | Comments
Add to Recipe Box
What doesn’t this soup have? Dairy, soy, nuts, high fat, or gluten. What does it have? Creamy, warm satisfying flavor and nutrition in a low calorie/low fat meal. It’s also very budget friendly. What’s not to like about that?!
Kristy
Ingredients:
- 1 large head broccoli
- 1 medium onion, diced
- 2 cloves garlic, minced
- 1 tbsp olive oil
- 1 tsp sea salt or to taste
- 1 tbsp parsley
- 1 tsp oregano
- 1/2 tsp thyme
- 1/4 tsp red pepper flakes or to taste
- 1/8 tsp ground black pepper or to taste
- 3 cups low sodium vegetable broth
- 1 can (15 ounces) cannellini beans, drained
- 1/4 cup nutritional yeast
- 1 lemon, cut into 4 wedges (optional)
Preparation:
- Cut the broccoli florets off the stem and into bite size pieces. Dice the stems into small pieces. You should have about 2 cups of florets and 1 cup diced stems.
- In a large soup pot heat the oil over medium high heat. Add the onion, diced broccoli stems, garlic and salt.
- Cook until the onions are tender. Add the parsley, oregano, thyme, red pepper flakes and black pepper. Cook another minute.
- Add the broth and beans. Bring to a simmer and cook 7-10 minutes or until the broccoli is tender.
- While the broth is simmering steam the broccoli florets until just tender crisp and still bright green. Set aside and keep warm.
- Blend the broth mixture with an immersion blender, food processor or regular blender until smooth. Blend in the nutritional yeast.
- Ladle into bowls and add equal amounts of the steamed florets into each bowl.
- Top with additional red pepper flakes and a squeeze of lemon juice if desired.
Yield:
Makes 4 servings
Notes:
Store leftovers in an airtight container in the refrigerator for up to 5 days. Reheat on low.
Rawlicious Pad Thai Salad
Jan 07 2013 by | Comments
Add to Recipe Box
It’s a new year and one of the most popular resolutions is to eat more fruits and vegetables. I happen to love salads but sometimes you can only handle so much lettuce and dressing before it just gets boring. This salad is a great way to pack your meal with loads of healthy RAW vegetables and it’s delicious and flavorful too! In this recipe I used a vegetable spiralizer to make the ‘noodles’ but if you don’t have this fun kitchen gadget on hand you can always use a sharp knife and thinly julianne the zucchini yourself. Either way you’ll have a fabulous meal that is perfect for lunch or dinner. Enjoy!
~Sarah
Ingredients:
For the sauce:
- 3 tbsp peanut oil
- 1 tbsp sesame oil
- 1 heaping tbsp lemon juice
- 1 tbsp coconut nectar
- 1 tbsp Nama Shoyu (you can use soy sauce or gluten free tamari for a non-raw but gluten free option)
- 1 1/2 tbsp brown rice vinegar
- 1 tbsp fresh orange juice
- 1/4 cup natural peanut butter
For the salad:
- 2 large zucchini
- 1/2 medium red pepper, seeded and diced
- 1 cup cut snow peas
- 1/2 cup diced carrots
- 1 cup diced mushrooms
- 2-3 tbsp Nama Shoyu
- 3/4 cup bean sprouts
- roughly chopped cilantro, green onions or crushed peanuts for garnish (optional)
Preparation:
- Place all the ingredients for the sauce in a blender and process until smooth. Set aside.
- Place the diced pepper, peas, carrots and mushrooms in a large bowl and mix with 2-3 tbsp Nama Shoyu. You want the vegetables to be coated but not wet. Spread them in an even layer on a dehydrator sheet and place in the dehydrator at 115 degrees (if you don’t have a dehydrator you can place them in the oven on the lowest temperature setting available) for about 15 minutes.
- Using a vegetable spiralizer (or use a sharp knife to julianne the zucchini into thin strips), follow the directions for your specific model to create the zucchini noodles.
- Place the noodles in a bowl, top with bean sprouts, sauce and the marinated vegetables. Add the optional garnish if desired and enjoy!
Yield:
Makes 2 servings as a main meal and 4 as a side dish.
Notes:
This dish is best when eaten right away. You can make the sauce and even marinate the vegetables ahead of time but the zucchini noodles should only be cut when the dish is ready to be served.
Winter Vegetable Pie
Dec 17 2012 by | Comments
Add to Recipe Box
The ingredients in this dish are some of my favorites that I use over and over again in a variety of different ways. For this recipe I was looking to make something similar to a Shepherd’s Pie. I especially love the addition of couscous because it makes the filling so creamy. Winter might not be my favorite season but I certainly enjoy the winter harvest.
Kristy
Ingredients:
- 3 tbsp olive oil, divided
- 1/2 butternut squash peeled, seeded and diced into 1/2 inch cubes
- 2 large sweet potatoes
- 1 medium onion, diced
- 1/2 red pepper, seeded and diced
- 3 cloves garlic, minced
- 1 tsp sea salt, divided
- 5 oz baby spinach
- 3 tsp paprika
- 2 tsp cumin
- 1 tsp ancho chili pepper (if you sub with another chili pepper adjust according to heat level)
- 1/4 tsp black pepper, divided
- 2 cans (14.5 ounces) no salt added fire roasted diced tomatoes
- 1 can (15 0unces) no salt added garbanzo beans, drained
- 1 cup whole wheat couscous
- 1 cup low sodium vegetable broth
- 1 tsp fresh parsley, minced
Preparation:
- Preheat oven to 350 degrees. Prick the sweet potatoes with a fork or knife and place in the oven. Bake 1 hour or until tender.
- Toss the squash cubes in 1 tbsp oil and place in a single layer on a baking sheet. Place in the oven with the potatoes during the last 20-25 minutes of baking time. Bake until tender. Remove from the oven and set aside.
- Heat the remaining 2 tbsp of oil over medium high heat in a large pot. Add the onion, red pepper, garlic and 1/2 tsp salt. Cook 6-8 minutes or until the onion is soft. Add the spinach and continue to cook until the spinach has wilted.
- Season with the paprika, cumin, chili pepper and 1/8 tsp black pepper.
- Stir in the roasted squash cubes, tomatoes, beans, couscous, broth and parsley.
- Transfer to a 13 x 9 or similar size baking dish.
- Peel and mash the sweet potato with the remaining salt and black pepper.
- Spread evenly over the top of the vegetable mixture. Cover and bake 30 minutes or until hot and bubbly.
Yield:
Makes approximately 8 servings.
Notes:
Store leftovers in an airtight container for up to 5 days.
Creamy Kale and Roasted Vegetable Soup
Dec 10 2012 by | Comments
Add to Recipe Box
This soup is seasonal eating at its most delicious. It’s a hearty soup that is perfect for lunch or dinner. The recipe makes a good amount and leftovers can easily be stored in the freezer for a quick meal on busy nights.
~Sarah
Ingredients:
- 2-3 medium sized carrots, sliced
- 2 large tomatoes, quartered
- 1 large onion, cut into thick slices
- 1 red or orange pepper, seeded and cut into chunks
- 1 small butternut or delicata squash (you could also use 1/2 an acorn squash), peeled, seeded and cut into 1/2 inch cubes
- 4-5 garlic cloves, peeled
- 1 tbsp olive oil
- 6-8 cups vegetable broth
- 4-5 cup chopped kale
- 2 cups cooked beans of your choice (Great Northern, Chickpea, Cannellini or any hearty bean will do)
- 1-1 1/2 cups nutritional yeast
- 1 tsp oregano
- 1 tsp sea salt
- black pepper to taste
Preparation:
- Preheat oven to 400 degrees.
- Place the carrots, tomatoes, onion, pepper, squash and garlic on a lined baking sheet and drizzle with olive oil, salt and black pepper to taste. Place in the oven for 45-60 minutes, stirring occasionally, until vegetables are brown and tender.
- Remove from oven and let cool for about 5 minutes. Transfer the garlic, tomatoes and onions to food processor or blender and process until smooth. Add the mixture to a large soup pot and heat on medium high heat.
- Add the pepper and squash to the soup pot along with the remaining ingredients and bring to a boil. Reduce to a simmer and cook, uncovered, for 30 minutes.
- Season with additional salt and pepper if desired.
Yield:
Makes 8-10 cups.
Notes:
Leftover soup can be stored in an airtight container in the fridge for up to 5 days. You can also freeze any leftovers in freezer safe containers until ready to use.


